TL;DR: The code for this article is available from this GitHub repository. To use it, you would also need Microsoft Azure Account - get a free trial, or Azure for Students).
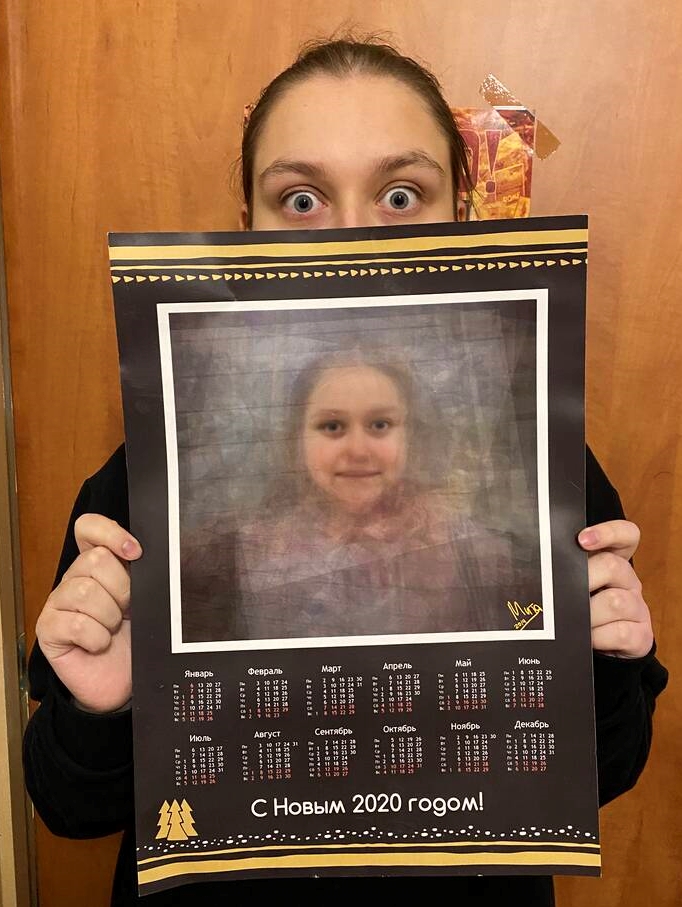
December is the time of the year we are thinking about presents to our friends and family. Last Christmas, I was able to surprise my close friends by printing custom calendars with their Cognitive Portraits. This year, I wanted to automate this process further, and explored Face Identification features of Face API to automatically find photographs of friends in my photo archive and make some cognitive portraits for them!
For those of you who are not familiar with Cognitive Portraits - it is a technique where we mix several photographs of people together, aligning them in such a way that eyes are at the same position. It uses Cognitive Services to extract facial landmarks. You can check out this GitHub repo for more code examples, and this blog post for detailed description.
So the idea I explore in this blog post is simple: let’s go over our entire photo archive, extract photographs of different people, and then see what we can do with it!
If you are not familiar with Face API, I recommend you to take Microsoft Learn Course.
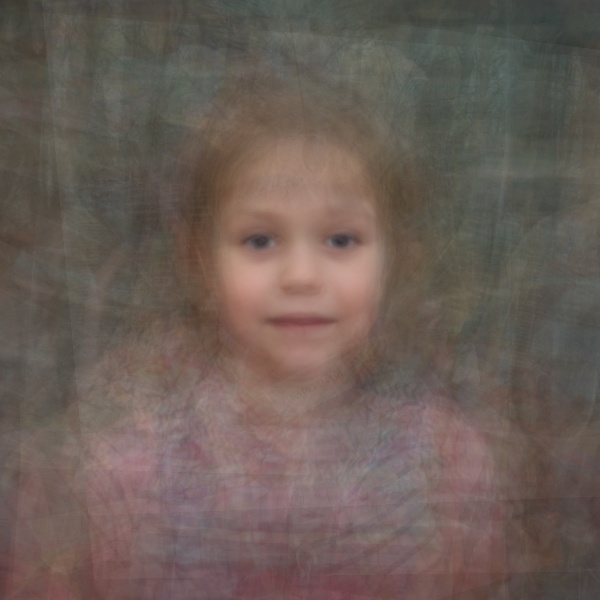 |  | 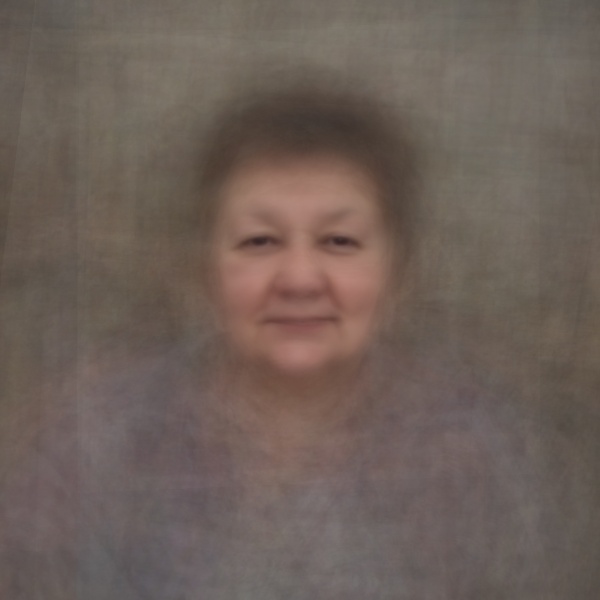 | 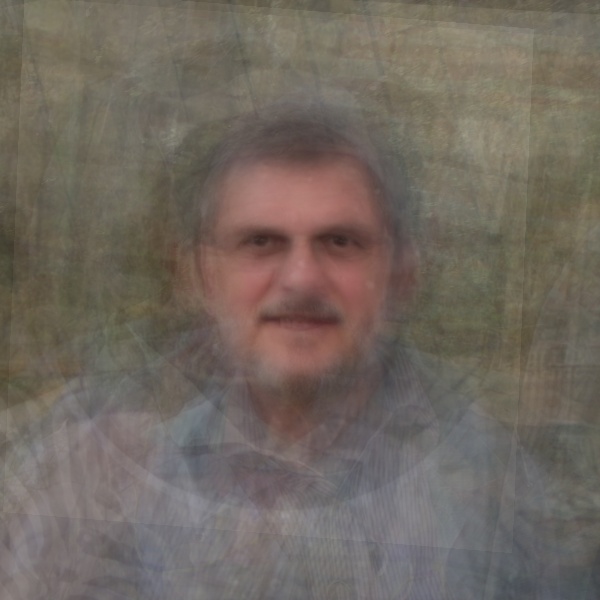 |  |
|---|
| Vickie | Dmitry | Mother | Father | Brother |
Creating Face SDK Cloud Resource
To use Face SDK, you need to create Face API endpoint in the cloud. The easiest way to do it is by using Azure Portal, and adding Face resource to your subscription. This link should take you to the correct location right away.
Note: Create payed version of the resource, because the free version has the limitation of 20 calls per minute, and you may run out of this limitation. Please check Face API pricing before that. At the time of this writing, it was around $1 per 1000 calls.
Once you have created the resource, grab endpoint and API key - you will need them later.
Face Identification
One of the things we want to do is to be able to find photographs of specific people, i.e. to identify their faces on photos. Face Identification is one of the features of Face API.
First, let’s collect photographs of all people whom we want to recognize into different subfolders of train_dir folder. It will look something like this:
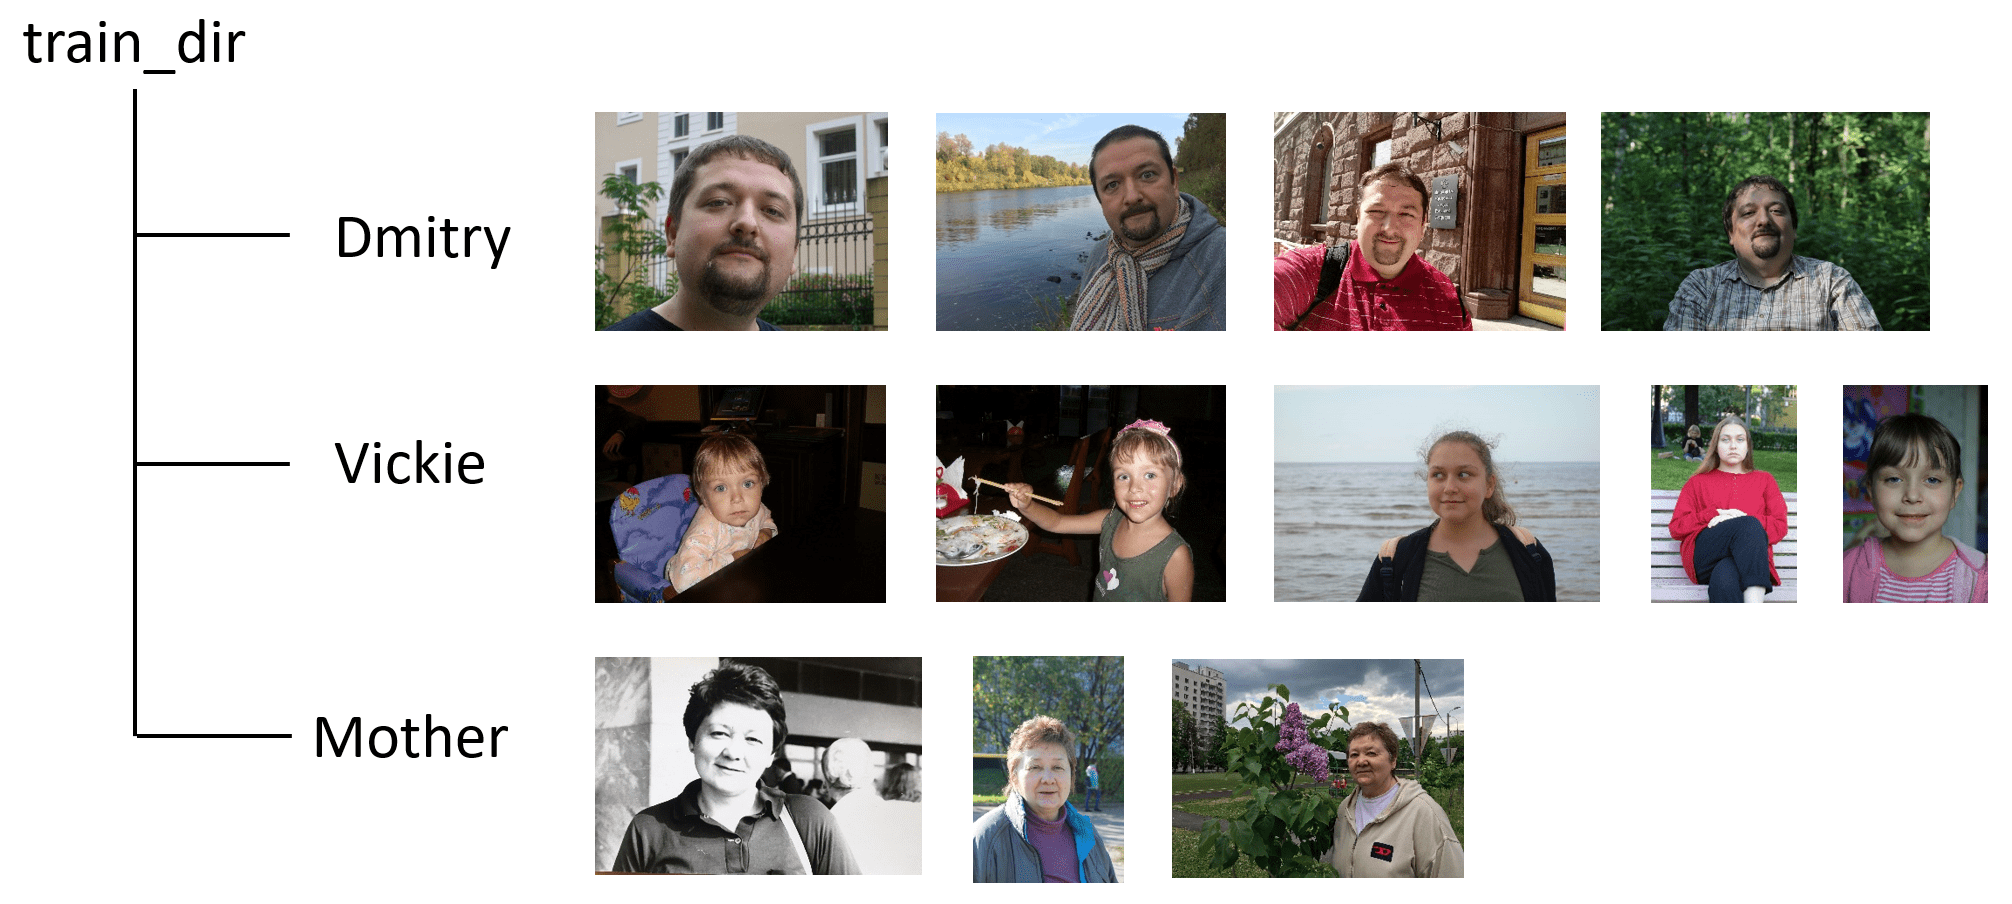
To train Face API to identify those faces, we first need to create so-called People Group and upload all the photographs there. This can be easily done via Face API Python SDK - see good documentation here.
Make sure you have the latest version of the SDK installed:
pip install --upgrade azure-cognitiveservices-vision-face
Then, the following piece of Python code will do the job (make sure to specify correct key and endpoint):
from azure.cognitiveservices.vision.face import FaceClient
from msrest.authentication import CognitiveServicesCredentials

key = '...'
endpoint = '...'
pg_id = 'mypeople'
src_dir = 'train_dir'

cli.person_group.create(pg_id,"My family album person group")

for p in os.scandir(src_dir):
    pers = cli.person_group_person.create(pg_id,p.name)
    for f in os.scandir(os.path.join(src_dir,p.name)):
        with open(os.path.join(src_dir,p.name,f.name),'rb') as s:
            cli.person_group_person.add_face_from_stream(pg_id,
                                              pers.person_id,s)
Once we have uploaded all photos, we need to train the person group. To do this, we initiate the training, and then check the training status periodically, until it either succeeds of fails:
from azure.cognitiveservices.vision.face.models \
import TrainingStatusType as TST

cli.person_group.train(pg_id)
while True:
    stat = cli.person_group.get_training_status(pg_id)
    if stat.status in [TST.succeeded,TST.failed]:
        break
    time.sleep(5)
It might also be a good idea to store the relationship between people’s names and their IDs (available programmatically as pers.person_id in the code above) - all other work with people identification will be based on those IDs. To see how this can be done, check the full source code of trainfaces.py script.
Choosing how to Store the Data
Since we want to process our entire photo archive, we want to use some kind of permanent solution to store processing results of Face API, so that we can always use them later. We can do that in several different ways:
- Storing results in individual JSON files next to original photographs. This is probably a good way to go, but it will add a lot of extra files into your archive, and having a lot of relatively small files on disk might not be a good idea (in terms of processing speed as well)
- Storing results in SQL or NoSQL databases, such as SQLite or MongoDB. This would allow fancy querying, but seems like a bit of an overkill solution to me.
- Using Python persistent dictionaries. There are essentially two options:
- dbm is a simple dictionary with keys and values being strings, based on dbm format which is popular in the UNIX world.
- Shelve library is more advanced, because it allows values to be any serializable Python objects.
I have decided to go with Shelve, in order not to worry about storing arbitrary structures, such as numpy arrays and nested dictionaries. Working with a persistent dictionary is very straightforward:
- open it using
db=shelve.open('db') - access it like an ordinary Python dictionary:
db[key]=value, db.keys(), etc. - to make sure the content is saved on disk, you may want to call
db.sync() periodically
Local Face Detection
Since each call to a Face API costs money, and photo archives tend to grow very big, I decided to minimize costs by using local face detection on my computer. Before sending a picture to the cloud, I would try to see if there are any faces on the photo, and if they are large enough.
For local face detection, I have decided to use dlib library, which is an advanced ML/Image Processing library similar in spirit to OpenCV. It contains out-of-the-box functionality for face detection:
detector = dlib.get_frontal_face_detector()
...
faces = detector(image,0)
Arguments to the face detection call are the image, and magnification factor - the algorithm can upscale the image by specified factor before detecting faces in order to increase accuracy on small faces. In our case, we only need faces that are sufficiently large, so we can leave it at 0.
Processing the Archive
Now we can put all details together and write the main code to process our whole photo archive. First, let’s collect the list of all files to be processed. We can traverse directory tree and get the list of all files using breadth-first search:
all_files = []
queue = [source_directory]
while len(queue)>0:
  cd = queue.pop(0)
  for f in os.path.join(source_directory, cd):
    fn = os.path.join(source_directory, cd, f.name)
    if f.is_dir():
       queue.append(fn)
    if f.is_file():
       all_files.append(fn)
Now that we have the list of all files, we can start processing them one by one. Slightly simplified version of the processing code looks like this (see the full version on GitHub):
detector = dlib.get_frontal_face_detector()
db = shelve.open('db/photos.db')
for f in all_files:
    if f not in db.keys():
        img,exif_date = imload(f)
        faces = detector(img,0)
        if len(faces)>0:
            with open(f,'rb') as str:
                res = cli.face.detect_with_stream(str,
                    return_face_id=True,
                    return_face_landmarks=True,
                    return_face_attributes=[...])
            ids = [f.face_id for f in res]
            ids = cli.face.identify(ids)
            db[f] = {
                 "date" : exif_date,
                 "faces" : enrich(res.as_dict(),ids)
            }
For loading the image, we will use imload function, which will not only load the image from disk, but also extract EXIF date when the photo was taken:
from PIL import Image
import datetime

def imload(fn):
    im,dt = None, datetime.MINYEAR
    try:
        im = Image.open(fn)
        dt = im._getexif()[36867]
        st = time.strptime(dt,"%Y:%m:%d %H:%M:%S")
        dt = datetime.datetime(*st[:6])
    except:
        pass
    return im, dt
Face processing consists of two parts:
- First we call the
detect_with_stream function to do actual face detection. What we get as a result is a list of faces with their attributes, such as age, emotions, etc. It is also important to pass return_face_id parameter, so that Face IDs are also returned - we will need them at the next step. - Identify if some of the faces belong to people from the people group. To do this, we call
identify method, passing the list of Face IDs in question.
We end up having two lists - a list of all faces + attributes, and the list of recognized IDs. To simplify further working with data, it makes sense to store just one list of faces, and add recognized person ID to this list. This is done by enrich function:
def enrich(faces,ids):
  idmap = { x.face_id : '' if len(x.candidates)<1
            else x.candidates[0].person_id for x in ids }
  for i,f in enumerate(faces):
    fid = idmap.get(f['face_id'],'')
    faces[i]['person'] = fid
There are a few additional complications that you may experience, and which are taken into account in the complete version of the code:
- Face API has a limitation on the size of the image. If the image is sufficiently big, we scale it down by the factor of 2, and then multiply all coordinates of facial landmarks returned by Face API by this factor.
- If the number of images is too large, we may want to process certain fraction of images, say, 20%. The code to chose only 20% of images can be added to the main processing loop.
- If the process is stuck somewhere in the middle, we may want to restart processing from a certain directory, instead of checking every file in the list.
We ended up with a huge collection of photographs, each of them containing a number of faces, some of them recognized as our friends (they have corresponding Person ID). Now we need to go through all faces and collect all the faces of each recognized person into one big list. This is done using prepare.py script like this:
for k,v in db.items():
    img = cv2.imread(k)
    if img is None: continue
    img = cv2.cvtColor(img,cv2.COLOR_BGR2RGB)
    for f in v['faces']:
        if f['person']=='': continue
        if f['person'] not in faces.keys():
            faces[f['person']] = []
        faces[f['person']].append(
          { "date" : v['date'],
            "img" : transform(img,f['face_landmarks']),
            "pose" : f['face_attributes']['head_pose']
          })
We also apply affine transformations to the images, aligning eyes and middle of the mouth to be located at the same coordinates. This is done using affine transformations, as described in my earlier post:
size = 300
target_triangle = np.array([(130,120),(170,120),(150,160)])

def transform(image,f):
    mc_x = (f['mouth_left']['x']+f['mouth_right']['x'])/2.0
    mc_y = (f['mouth_left']['y'] + f['mouth_right']['y']) / 2.0
    tr = cv2.getAffineTransform(
      np.float32([
         (f['pupil_left']['x'],f['pupil_left']['y']),
         (f['pupil_right']['x'],f['pupil_right']['y']),
         (mc_x,mc_y)]), target_triangle)
    return cv2.warpAffine(image,tr,(size,size))
Aligned images are stored in the img field of the dictionary, together with date and pose - rotation angle of person’s head in three directions.
Generating the Result
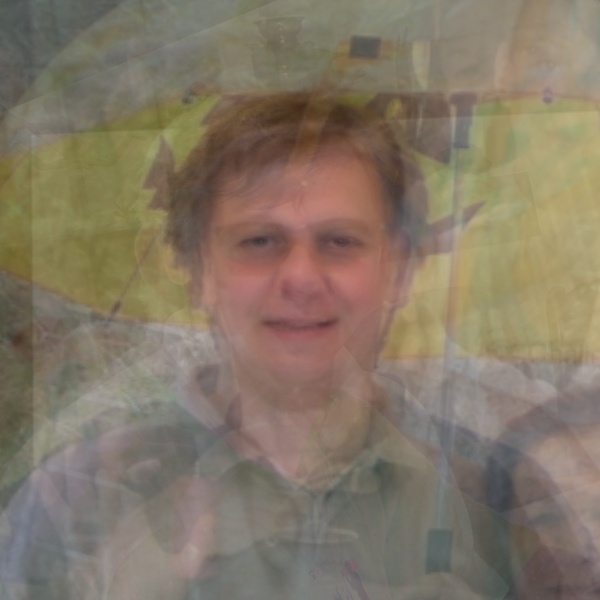
Once we have prepared the data in such a way, we can easily generate cognitive images for all our friends! We just need to pick up a number of aligned images (imgs), and average them out like this:
res = imgs.astype(np.float32)
res = res.mean(axis=0).astype(np.ubyte)
An interesting question is how many images to pick. Having too many images results in a very blurry result, while too few create more “messy” image:
 |  | 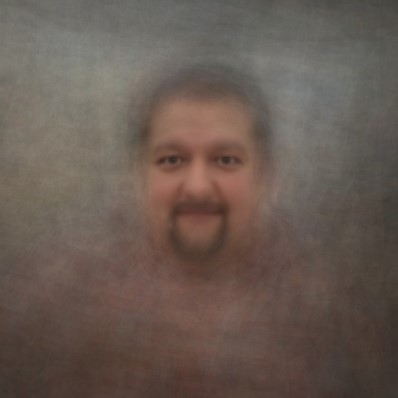 |
|---|
| 5 images | 15 images | 100 images |
Probably the best idea would be to experiment, and generate multiple results with different number of mixed together images. You can see the complete code in generate.py.
One more trick implemented in that script is filtering out photos with extreme head rotations. When you combine together faces that look in different directions, the result is not ideal. It is better to allow only small head rotations from the main direction of sight. This code will keep only those image where head is looking more or less straight:
def goodangle(x):
    return abs(x['yaw'])<15 and abs(x['pitch'])<15

for p,v in faces.items():
    good_faces = list(filter(lambda x: goodangle(x['pose']),v))
    ...
Results
In this blog post, I have described how we can use Face API to find faces of your friends in your photo album and create Xmas presents out of those pictures. While the whole process took me a few days and around $10 in Azure bills, it is definitely worth it! And not only because my friends will hopefully enjoy the presents, but also because this data will give me a few more occasions to write something interesting for this blog!